![]()
![]() [ UPDATE — May 1, 2020 ]: The best way to get started with this dapp development stack is to fork
[ UPDATE — May 1, 2020 ]: The best way to get started with this dapp development stack is to fork ![]() scaffold-eth. It abstracts away a lot of the installation and setup that this guide covers.
scaffold-eth. It abstracts away a lot of the installation and setup that this guide covers.
![]() This is an experiment to try to make a super approachable “Create Ethereum App” toolkit to spark more tinkering on new products from new developers!
This is an experiment to try to make a super approachable “Create Ethereum App” toolkit to spark more tinkering on new products from new developers!
![]() [Warning]: This tutorial is hard mode. I’m publishing it just so I have it around and others can skim it at their own risk. It is basically me documenting my journey to build
[Warning]: This tutorial is hard mode. I’m publishing it just so I have it around and others can skim it at their own risk. It is basically me documenting my journey to build ![]() easy mode.
easy mode.
 Node
Node
First, you’ll need NodeJS>10, Git, and Yarn installed. Run node --version to see:
![]()
![]()
If you have problems setting up your Node environment get help here.
 Create Eth App
Then we can jump off with create-eth-app:
yarn config set workspaces-experimental trueyarn create eth-app my-eth-app --template uniswapcd my-eth-appyarn react-app:start
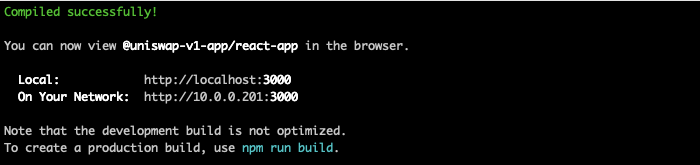
This sets us up with a project directory my-eth-app and fires up a React app.

If you are just creating a frontend, drop your contracts in packages/contracts and you are off to the races: http://localhost:3000. (You can skip to the Frontend section below.)

Keep an eye on the Create Eth App community because I think it’s really warming up!
This also brings in the
Uniswap contracts and gives us some hints on interfacing with the contracts in
React.
This sets us up to use
Ethers.js and also leverages
TheGraph.
Our goal is to create a smart contract backend and frontend at the same time: a hot reloading app on contract edit.
 Buidler
Buidler is a task runner for Ethereum. We’ll use it for all our low level smart contract compiling, debugging, and orchestration. From a new terminal, let’s install Buidler in a new folder named: my-eth-app/packages/buidler :
cd my-eth-app
cd packagesmkdir buidler
cd buidler
yarn init -y
yarn add --dev @nomiclabs/buidler @nomiclabs/buidler-truffle5 @nomiclabs/buidler-web3 web3
We bring in the format of
Truffle and
Web3.js because if you google for help, you’ll likely find them. We want this tutorial to be as generic as possible so it might be heavier than a production stack. For example, many developers prefer to use
Waffle and
Here is a great example of a Buidler+Ethers+Waffle+TypeScript stack.
Fire up Buidler and ask it to create an empty buidler.config.js :
cd my-eth-app/packages/buidlernpx buidler


This buidler.config.js is where we will have all our smart contract orchestration logic; compiling, deploying, debugging, testing, and publishing.
The config file will start empty as module.exports = {} and we’ll add to it as we go.
 Blockchain
Now that we have Builder installed, let’s use it to start a local blockchain:
cd my-eth-app/packages/buidlernpx buidler node

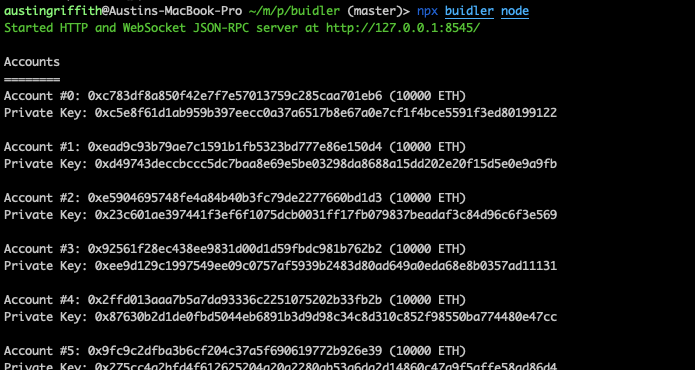
Our local test chain is available at http://localhost:8545 for RPC calls and it comes with a bunch of test accounts loaded with test ether!
This implementation of the EVM is created with debugging in mind. We will see lots of feedback in this terminal.
 Accounts
Just like in the Buidler getting started guide, let’s make sure we can list our accounts. Open up your favorite code editor and let’s create an accounts() function in the my-eth-app/packages/buidler/buidler.config.js file:
const { usePlugin } = require(‘@nomiclabs/buidler/config’)
usePlugin(“@nomiclabs/buidler-truffle5”);task(“accounts”, “Prints the list of accounts”, async () => {
const accounts = await web3.eth.getAccounts();
for (const account of accounts) {
console.log(account);
}
});module.exports = {
defaultNetwork: ‘localhost’,
networks: {
localhost: {
url: ‘http://localhost:8545’,
/*
accounts: {
mnemonic: “SOME MNEMONIC TEXT HERE”
},*/
},
},
solc: {
version : “0.6.6”,
optimizer: {
enabled: true,
runs: 200
}
}
}
We also added some config at the bottom to allow us to control our compile better and switch between networks. Notice the mnemonic option, this gives us the ability to switch to a wallet we control and not use the accounts built into the chain because we won’t have those in production.
Now let’s try it out and see if we can get a list of local accounts:
cd my-eth-app/packages/buidlernpx buidler accounts


Let’s create a balance() function in the buidler.config.js :
task(“balance”, “Prints an account’s balance”)
.addPositionalParam(“account”, “The account’s address”)
.setAction(async (taskArgs) => {
const balance = await web3.eth.getBalance(taskArgs.account)
console.log(web3.utils.fromWei(balance, “ether”), “ETH”);
});
Then let’s ask for the balance of the first account from the list above:
npx buidler balance 0xc783df8a850f42e7F7e57013759C285caa701eB6


 Sending ETH
One helpful function to add is a send() in the buidler.config.js
task(“send”, “Send ETH”)
.addParam(“from”, “From address or account index”)
.addOptionalParam(“to”, “To address or account index”)
.addOptionalParam(“amount”, “Amount to send in ether”)
.addOptionalParam(“data”, “Data included in transaction”)
.addOptionalParam(“gasPrice”, “Price you are willing to pay in gwei”)
.addOptionalParam(“gasLimit”, “Limit of how much gas to spend”)
.setAction(async (taskArgs) => {
let to
if(taskArgs.to){
to = taskArgs.to
}
let txparams = {
from: taskArgs.from,
to: to,
value: web3.utils.toWei(taskArgs.amount?taskArgs.amount:“0”, “ether”),
gasPrice: web3.utils.toWei(taskArgs.gasPrice?taskArgs.gasPrice:“1.001”, “gwei”),
gas: taskArgs.gasLimit?taskArgs.gasLimit:“24000”
}
if(taskArgs.data !== undefined) {
txparams[‘data’] = taskArgs.data
}
return new Promise((resolve, reject) => {
web3.eth.sendTransaction(txparams,(error, transactionHash) => {
console.log(Error: ${error} : transactionHash: ${transactionHash})
})
})
});
And let’s make sure we can send ether from one account to another:
npx buidler send --from 0xc783df8a850f42e7F7e57013759C285caa701eB6 --to 0xeAD9C93b79Ae7C1591b1FB5323BD777E86e150d4 --amount 1


![]() Check the balance again to make sure it has changed.
Check the balance again to make sure it has changed.


![]() Try this eth.build to double-check your local balances
Try this eth.build to double-check your local balances
Grab this up-to-date
buidler.config.jsgistIt includes extra helper functions like the
addr()wrapper so you can (optionally) refer to accounts by their index innpx accounts:
npx buidler balance 1
npx buidler send --from 0 --to 1 --amount 10
![]() At this point we have a test chain, we have accounts, and we have test ether. We are ready to write our contracts, test them, and get them deployed. Let’s create a few different directories to keep things organized:
At this point we have a test chain, we have accounts, and we have test ether. We are ready to write our contracts, test them, and get them deployed. Let’s create a few different directories to keep things organized:
cd my-eth-app/packages/buidlermkdir contracts test scripts
 contracts/
Let’s create our first smart contract MyContract.sol at my-eth-app/packages/buidler/contracts/MyContract.sol with a simple owner mechanic, just to get us started:
pragma solidity >=0.5.0 <0.7.0;import “@nomiclabs/buidler/console.sol”;contract MyContract { address public owner; constructor() public {
owner = msg.sender;
console.log(“MyContract is owned by:”,owner);
}
}
console.log? This is not Javascript here, it’s Solidity.
Now we can compile our contracts with:
cd my-eth-app/packages/buidlernpx buidler compile


This creates an “artifact” for your contract and if you are curious, you can inspect the file with
cat artifacts/MyContract.json. It includes the ABI (information about how to talk to your contract) and the Bytecode (compiled code to deploy).
 scripts/
The scripts folder will contain all of your orchestration. Right now, let’s put together a scripts/deploy.js so we can automate the deploying of our contracts.
const fs = require(‘fs’);
const chalk = require(‘chalk’);
async function main() {
const MyContract = artifacts.require(“MyContract”);
const myContract = await MyContract.new();
console.log(“MyContract deployed to:”, chalk.green(myContract.address));
fs.writeFileSync(“artifacts/MyContract.address”,myContract.address)
// put your MetaMask account here so you will own the contract:
//let newOwner = “0x9c5aA9a9EcC961a1AFd2EE8ef3798ea5094b6c0E”
//console.log(“Updating owner to “+chalk.magenta(newOwner))
//await myContract.updateOwner(newOwner)
// this is for after you make your contract a token:
//console.log(“Sending some tokens to the new owner too…”)
//await myContract.transfer(newOwner,””+10*10**18)
}
main()
.then(() => process.exit(0))
.catch(error => {
console.error(error);
process.exit(1);
});
artifactsfolder so we can inject it into our frontend.
Now let’s run our deploy script with:
npx buidler run scripts/deploy.js


We can also see the console.log over on our test chain output:

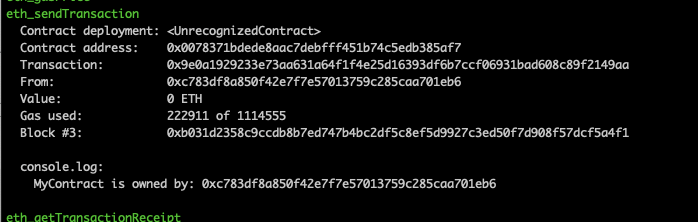
![]() Take a minute to bask in the glory of
Take a minute to bask in the glory of console.log in a smart contract! ![]()

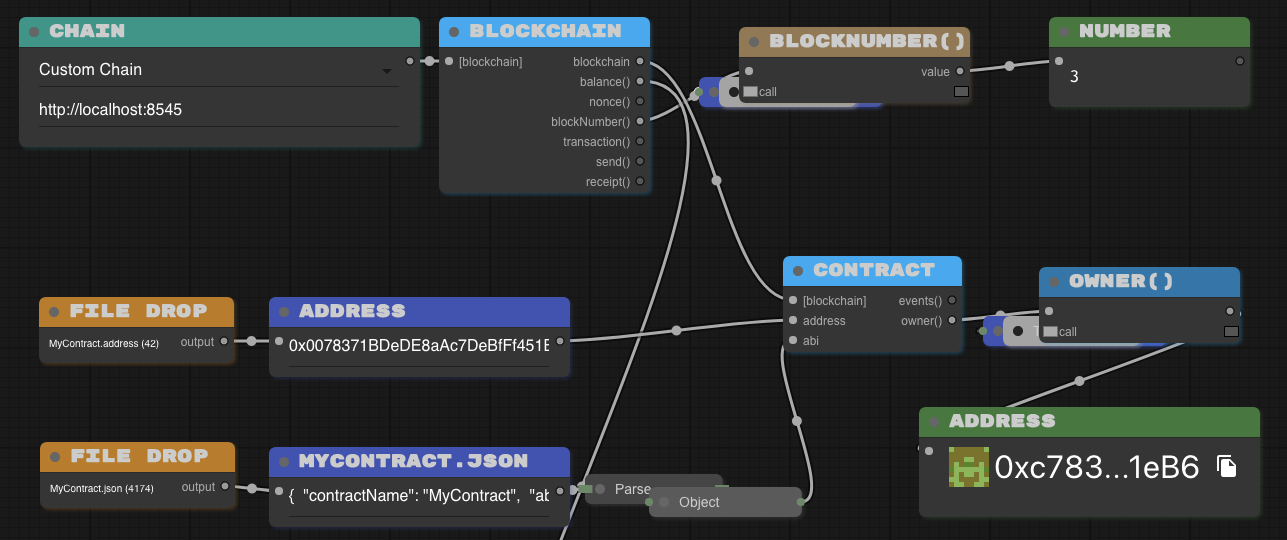
![]() Run this eth.build with your contract address to ask it who its owner is.
Run this eth.build with your contract address to ask it who its owner is.
 test/
test/
As your smart contract evolves you will want to write some tests for it. Let’s just write a quick example test test/myTest.js and save it for later:
const MyContract = artifacts.require(“MyContract”);
describe(“My Dapp”, function() {
let accounts;
let myContract;
before(async function() {
accounts = await web3.eth.getAccounts();
});
describe(“My Contract”, function() {
it(“Should deploy my contract”, async function() {
myContract = await MyContract.new();
});
describe(“owner()”, function() {
it(“Should have an owner equal to the deployer”, async function() {
assert.equal(await myContract.owner(), accounts[0]);
});
});
});
});
Now let’s run our tests to make sure the contract compiles and runs correctly:
npx buidler test


npx buidler testagain.Test your tests!?
 Publish
It’s important that whenever we deploy our contracts, we inject the new artifacts into our frontend. We want to be able to iterate on our UI and our contract logic in parallel. Let’s create a script for publishing our artifacts. Create a new file at my-eth-app/packages/buidler/scripts/publish.js :
const fs = require(‘fs’);
const chalk = require(‘chalk’);
const bre = require(“@nomiclabs/buidler”);
const contractDir = “./contracts”
async function main() {
const publishDir = “…/react-app/src/contracts”
if (!fs.existsSync(publishDir)){
fs.mkdirSync(publishDir);
}
let finalContractList = []
fs.readdirSync(contractDir).forEach(file => {
if(file.indexOf(“.sol”)>=0){
let contractName = file.replace(“.sol”,“”)
console.log(“Publishing”,chalk.cyan(contractName), “to”,chalk.yellow(publishDir))
try{
let contract = fs.readFileSync(bre.config.paths.artifacts+“/”+contractName+“.json”).toString()
let address = fs.readFileSync(bre.config.paths.artifacts+“/”+contractName+“.address”).toString()
contract = JSON.parse(contract)
fs.writeFileSync(publishDir+“/”+contractName+“.address.js”,“module.exports = "”+address+“"”);
fs.writeFileSync(publishDir+“/”+contractName+“.abi.js”,“module.exports = “+JSON.stringify(contract.abi));
fs.writeFileSync(publishDir+”/”+contractName+“.bytecode.js”,“module.exports = "”+contract.bytecode+“"”);
finalContractList.push(contractName)
}catch(e){console.log(e)}
}
});
fs.writeFileSync(publishDir+“/contracts.js”,"module.exports = "+JSON.stringify(finalContractList))
}
main().then(() => process.exit(0)).catch(error => {console.error(error);process.exit(1);});
Now we can publish whenever we want to update our contracts in our app:
npx buidler run scripts/publish.js


./packages/react-app/src/contractsbut I’m wondering if we can match the create-eth-app format better and put them in ./packages/buidler somewhere?
 Frontend
Now that our contract is getting injected into the React app, we are ready to start iterating on our frontend. We created a boilerplate with create-eth-app using the Uniswap template and now we can start adding some components.
Our app should already be up and running with yarn react-app:start (from the very first set of commands we ran):

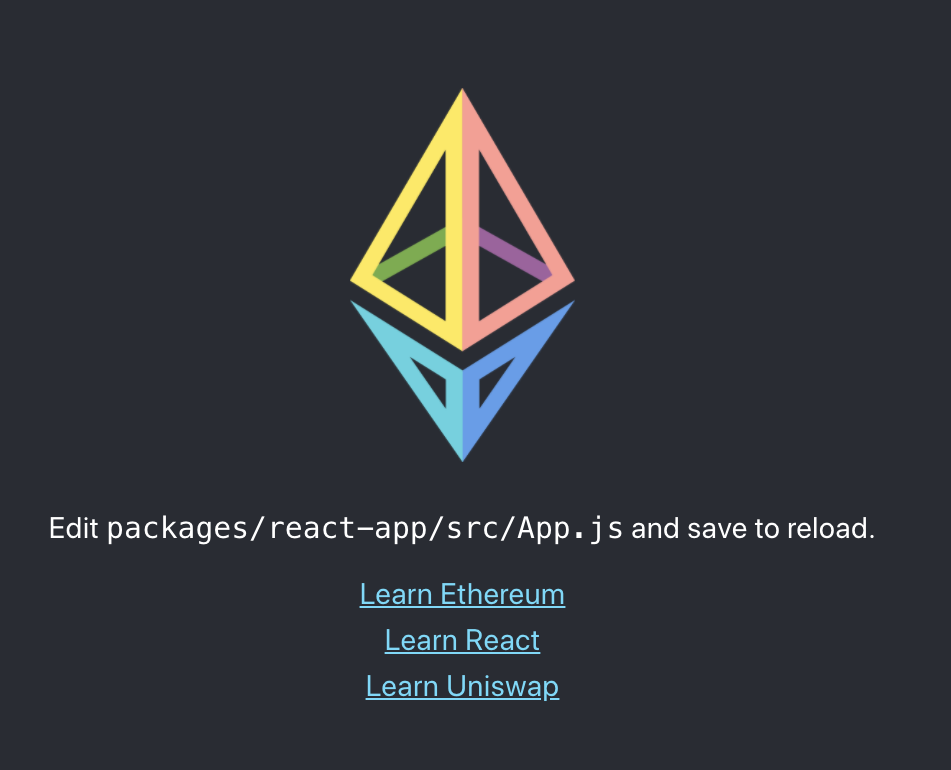
Open up my-eth-app/packages/react-app/src/App.js in your favorite code editor and we’ll start hacking on our app.
![]() Web3 Provider : Most apps will use
Web3 Provider : Most apps will use ![]() Infura or their own full nodes as a provider (reading from the blockchain) and then a chrome extension as the signer (injected wallet). Traditionally this was just
Infura or their own full nodes as a provider (reading from the blockchain) and then a chrome extension as the signer (injected wallet). Traditionally this was just ![]() MetaMask but now we can leverage communities like Web3Modal or web3-react.
MetaMask but now we can leverage communities like Web3Modal or web3-react.
Let’s create a mainnetProvider in our App() that is always connected to mainnet using Infura (backup failover is Etherscan) with Ethers.js.
Throw this first line up near the top of the App.js file:
const mainnetProvider = ethers.getDefaultProvider(“mainnet”)
Now we can use this connection to read from the main Ethereum network.
mainnetProvider. (We used Uniswap in this example.)
We will also need to talk to our own local Buidler node while we are working on our smart contracts. Therefore, we will also need a localProvider that will be pointed to http://localhost:8545 when we are working locally, but then switch to the main network once our contracts go live. Right after the mainnetProvider in App() , let’s add in this code to check our environment:
const FORCEMAINNET = false;
let localProvider = mainnetProvider
let LOCALHOST = false
if (!FORCEMAINNET && (window.location.hostname === “localhost” || window.location.hostname === “127.0.0.1”)){
localProvider = new ethers.providers.JsonRpcProvider(“http://localhost:8545”)
LOCALHOST = true;
}
![]() Poller : I always find myself needing to know up-to-date balances, the block number, the price of ETH, the price of gas, etc. Let’s create something that will poll for these things on a regular interval and update our state.
Poller : I always find myself needing to know up-to-date balances, the block number, the price of ETH, the price of gas, etc. Let’s create something that will poll for these things on a regular interval and update our state.
Let’s create my-eth-app/packages/react-app/src/Poller.js :
import React, { useEffect, useRef } from ‘react’;
export default function Poller(callback, delay) {
const savedCallback = useRef();
// Remember the latest callback.
useEffect(() => {
savedCallback.current = callback;
}, [callback]);
// Set up the interval.
useEffect(() => {
function tick() {
savedCallback.current();
}
if (delay !== null) {
let id = setInterval(tick, delay);
return () => clearInterval(id);
}
}, [delay]);
//run at start too
useEffect(() => {
callback()
}, []);
}
Then, if we import that into our packages/react-app/src/App.js with:
import Poller from “./Poller.js”;
importstatements are above everything else.
We can do this to poll for different variables like our balance or the block. Add this snippet of code inside your App() :
const [blockNumber, setBlockNumber] = useState();
Poller(async ()=>{
let nextBlockNumber = await localProvider.getBlockNumber()
if(nextBlockNumber!=blockNumber){
setBlockNumber(nextBlockNumber)
console.log(“BLOCK #”,nextBlockNumber)
}
},1777)
Whoops, sorry, you’ll also need to bring in React’s
useStatefor this to work:
import React, { useState, useEffect, useRef } from ‘react’
If you venture into your browser’s console, you’ll see new local blocks:


Let’s use the Uniswap contracts and the example that is already in App.js to get the price of ETH and keep it in the state too. Copy and paste this in below your last poller:
const [price, setPrice] = useState();
Poller(async () => {
const ethDaiExchangeContract = new ethers.Contract(
addresses[MAINNET_ID].exchanges[“ETH-DAI”],
abis.exchange,
mainnetProvider,
);
// A pre-defined address that owns some cDAI tokens
let exchangeRate = await ethDaiExchangeContract.getEthToTokenInputPrice(“1000000000000000000”); // price of 1 Ether in DAI
exchangeRate = ((exchangeRate.div(“10000000000000000”).toNumber())/100).toFixed(2)
if(exchangeRate!=price){
setPrice(exchangeRate)
console.log(“PRICE $”+exchangeRate)
}
},19777)


We’ll get the current gasPrice from ETH Gas Station using Axios:
cd my-eth-app/packages/react-appyarn add axios
Then bring Axios into your packages/react-app/src/App.js :
import axios from ‘axios’;
Then we bring in another Poller and use axios to get the current price of gas on the network. We’ll keep track of it in the app state as gasPrice :
const [gasPrice, setGasPrice] = useState();
const loadGasPrice = async () => {
axios.get(‘https://ethgasstation.info/json/ethgasAPI.json’)
.then(function (response) {
let newGasPrice = response.data.fast*0.1
if(newGasPrice!=gasPrice){
console.log("GAS ",newGasPrice,“gwei”)
setGasPrice(newGasPrice);
}
})
.catch(function (error) {
console.log(error);
})
}
Poller(loadGasPrice,39999)
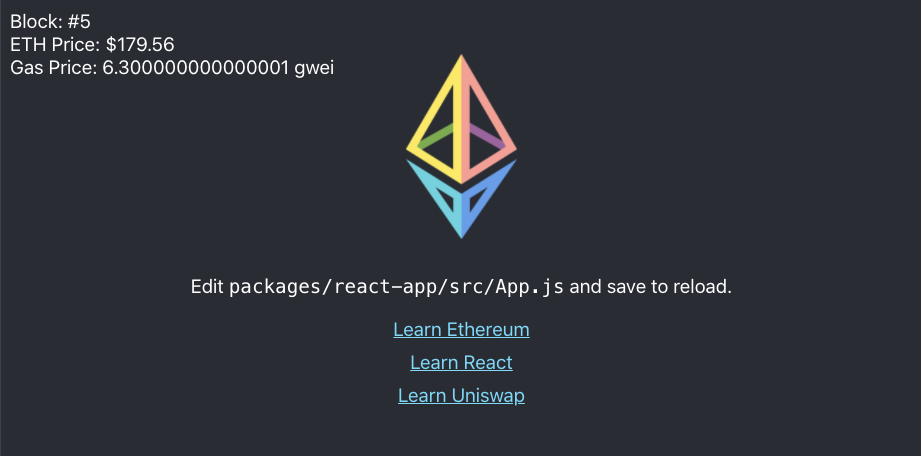
Now we can display these in the render somewhere:

Burner Provider
For a little user experience ![]() icing on the cake, we want users to get an Ethereum account as soon as they land on our app. (Instant onboarding without needing MetaMask or understanding seed phrases.) This is like a session wallet that can be used for quick transactions from an ephemeral private key. To do this, we’ll bring in the burner-provider:
icing on the cake, we want users to get an Ethereum account as soon as they land on our app. (Instant onboarding without needing MetaMask or understanding seed phrases.) This is like a session wallet that can be used for quick transactions from an ephemeral private key. To do this, we’ll bring in the burner-provider:
cd my-eth-app/packages/react-appyarn add burner-provider
Then bring it into our app:
import BurnerProvider from ‘burner-provider’;
We will track an injectedProvider (like MetaMask) but before anything is injected we will generate a new session wallet for the user. Throw this below our other pollers in our App() function:
const [injectedProvider, setInjectedProvider] = useState();
const createBurnerIfNoAccount = () => {
if (!injectedProvider){
if(localProvider.connection && localProvider.connection.url){
setInjectedProvider(new ethers.providers.Web3Provider(new BurnerProvider(localProvider.connection.url)))
}else{
setInjectedProvider(new ethers.providers.Web3Provider(new BurnerProvider(mainnetProvider.providers[0].connection.url)))
}
}else{
pollInjectedProvider()
}
}
React.useEffect(createBurnerIfNoAccount, [injectedProvider]);
The app will fail until we create a poller for the injectedProvider:
const [account, setAccount] = useState();
const pollInjectedProvider = async ()=>{
if(injectedProvider){
let accounts = await injectedProvider.listAccounts()
if(accounts && accounts[0] && accounts[0]!=account){
console.log("ACCOUNT: ",accounts[0])
setAccount(accounts[0])
}
}
}
Poller(pollInjectedProvider,1999)
Once we have the account we can poll its balance too:
const [balance, setBalance] = useState(0);
const pollBalance = async ()=>{
if(account&&localProvider){
let newBalance = await localProvider.getBalance(account)
newBalance = ethers.utils.formatEther(newBalance)
if(newBalance!=balance){
console.log(“NEW BALANCE:”,newBalance,“Current balance”,balance)
setBalance(newBalance)
}
}
}
Poller(pollBalance,777)


 Blockies
Real fast, we need to install a must-have for displaying addresses. It’s called a Blockie. These help visually verify accounts (mostly ![]() ) and are common across many existing applications. Let’s install:
) and are common across many existing applications. Let’s install:
cd my-eth-app/packages/react-appyarn add react-blockies
Import the package into our app:
import Blockies from ‘react-blockies’;
Finally, we can display the injected/session account and its balance in local test ETH in the top right corner. Throw this in your render:
Za više detalja provjerite